Hello, everyone! In today’s blog, I’ll guide you through solving a common problem that is Troubleshooting Windows Fingerprint Compatibility Issues : the inability to find a compatible fingerprint on Windows. If you’re facing the same issue, follow these troubleshooting methods to resolve it.

Method 1
Step 1: Group Policy Edit
- Open the Run dialog by pressing “Windows key + R.“
- Type “gpedit.msc” and click OK.
- Navigate to Computer Configuration > Administrative Templates > Windows Components > Biometrics.
- Enable the first four options by selecting them, clicking “Enable“, and then Apply and OK.
- Now go to Facial Features and then click on it .
- “Disable” the second option, click Apply, and then OK.

Step 2: Windows Services
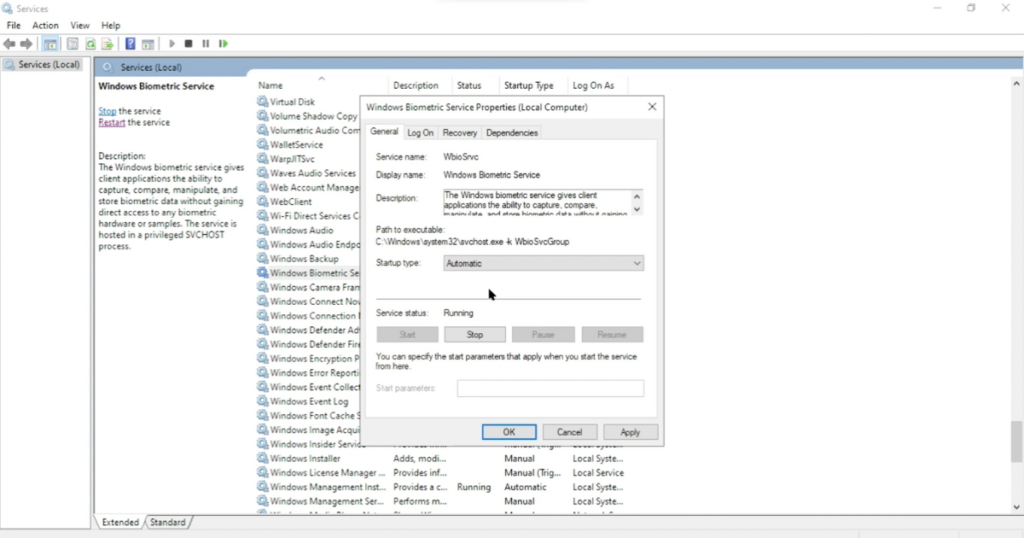
- Open the Run dialog and search for “services.msc.”
- Locate “Windows Biometrics” and double-click it.
- Set the startup type to “Automatic“, click Stop, then Start.
- Apply the changes and click OK.

Step 3: Device Manager
- Search for “Device Manager” in Windows search bar and open it.
- Look for “Biometrics Fingerprint.”
- If not found, enable it by going to C drive > Windows > System32 > WinBioPlugin > FaceDriver
- Open the second file, right-click, and choose “Install.”

Step 4: Update Driver
- In Device Manager, find “Biometric Fingerprint or Biometric Devices” Double Click on that file and update the driver.
- Choose “Search automatically for updated driver software.”

Step 5: Windows Update
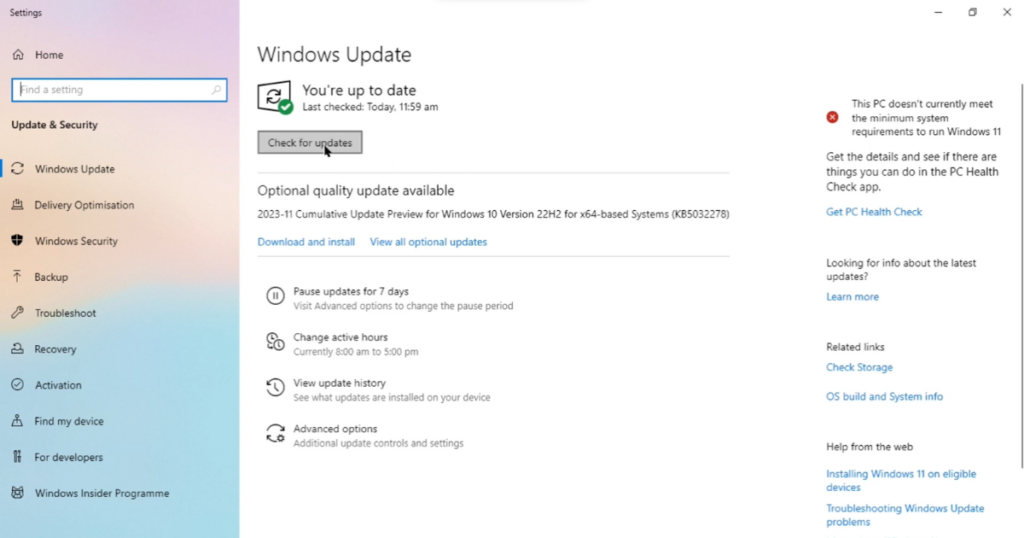
- Open the Windows Settings bar and search for “Windows Update Settings.”
- Click on “Check for updates” and let the system update.
- After the update, close the settings and restart your PC.

Method 2
Step 1: Adjust Windows Biometric Service Settings
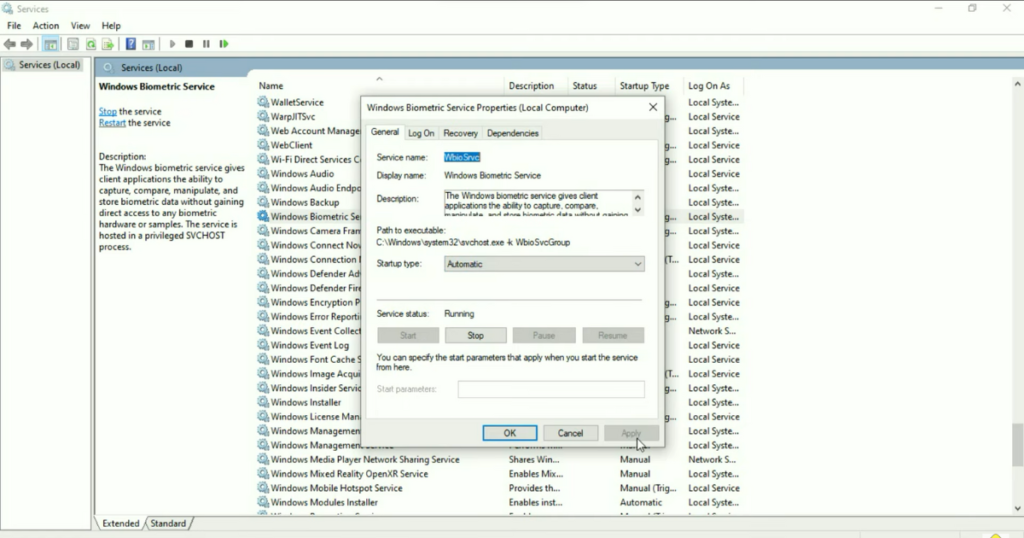
- Open Windows Services by clicking on the Windows icon and typing “services.”
- Locate the “Windows Biometric Service,” right-click on it, and select “Properties.”
- Ensure that the startup type is set to “Automatic” and click “Apply.”
- Stop the service and then start it again.
- Restart your laptop to check if the issue persists.

Step 2: Check Device Manager
- Right-click on the Windows icon and select “Device Manager.”
- Look for a driver labeled “Biometric Fingerprint” or “Fingerprint Driver.”
- If the driver is missing, navigate to the “C” drive > “Windows” folder > “System32.”
- Find the “WinBioPlugin” folder, open it, and locate the “face driver” folder.
- Right-click on “setup hello face” and select “Install” to install the driver.
- Open Device Manager again, click on “Scan for hardware changes,” and check if the driver appears under “Biometric Devices.”

Step 3: Update or Uninstall Device Driver
- If the issue persists, right-click on the driver in Device Manager and select “Update driver.”
- Choose the option to search automatically for updated driver software.
- If the problem persists, right-click on the driver again and select “Uninstall device” (do not check the box).
- Restart your laptop, and it should resolve the issue.

Step 4: Keep Your Operating System Updated
- Regularly check for updates by clicking on the Windows icon and searching for “Check for updates.”
- Updating your operating system ensures that your system drivers are also updated, potentially resolving any compatibility issues.
Conclusion:
In conclusion, troubleshooting laptop fingerprint scanner issues in Windows involves adjusting Windows Biometric Service settings, checking Device Manager for driver issues, updating or uninstalling the device driver, and keeping your operating system updated. By following these steps, you should be able to resolve the “Troubleshooting Windows Fingerprint Compatibility Issues” error and regain functionality of your fingerprint scanner. I hope this blog was helpful. Feel free to let me know in the comments if the problem is solved. Thank You!

