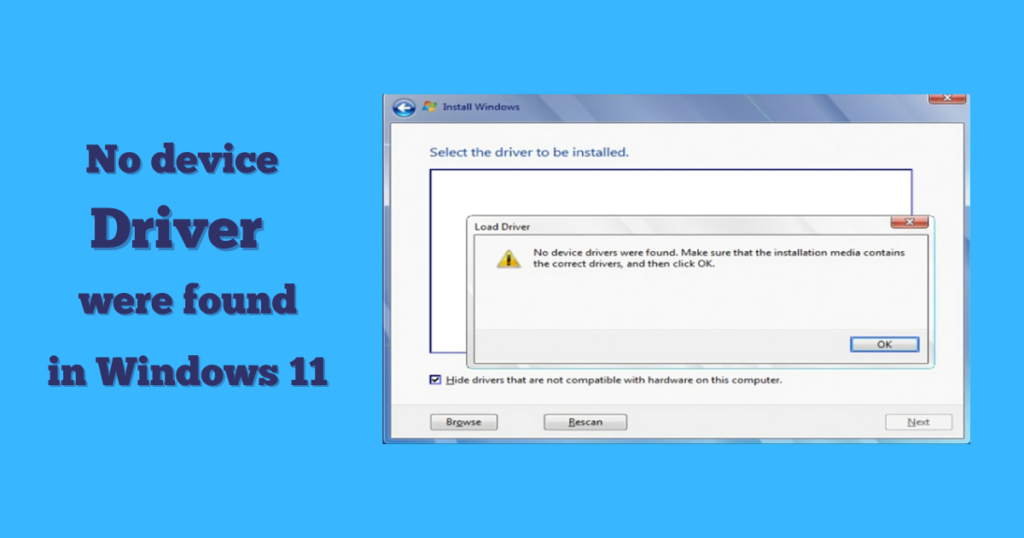
In this blog, we are going to discuss an issue that often arises when installing Windows using a bootable pen drive. During the installation process, you may encounter an error message stating, ‘We couldn’t find any drives.’ When you click on ‘Load Driver,’ another popup appears saying, ‘No device drivers were found.’ At this point, your local drives, such as C drive, D drive, E drive, are not displayed on your laptop.
In this blog, I will guide you on how to fix this error during the installation process. So, let’s get started.
Method 1: Switching USB Ports
The first step is to switch your USB port from USB 3.0 to USB 2.0, as this simple change may resolve the issue. If this doesn’t work, let’s move on to the next method.
Method 2: Creating a Bootable USB Drive
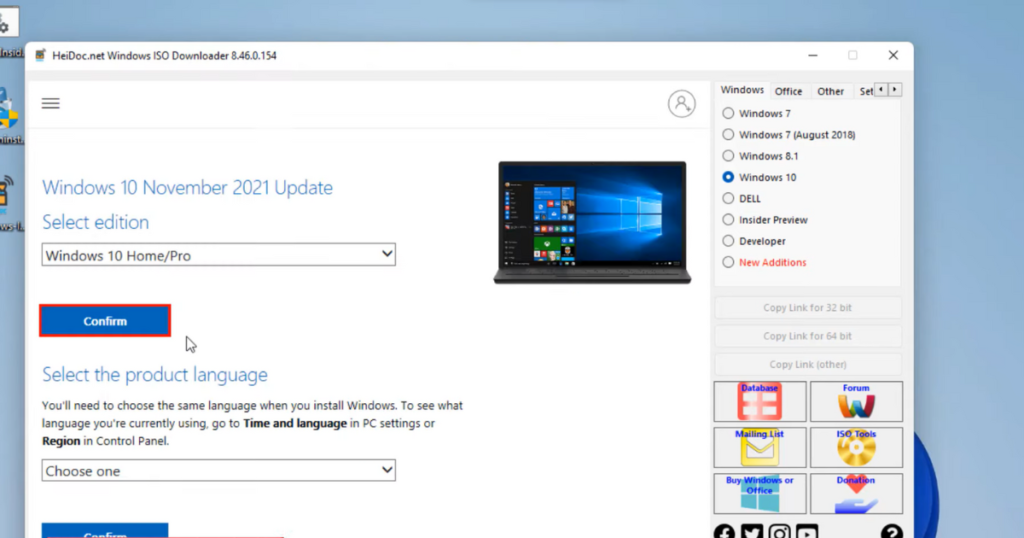
- Download the “Windows 10 or Windows 11 ISO file.“
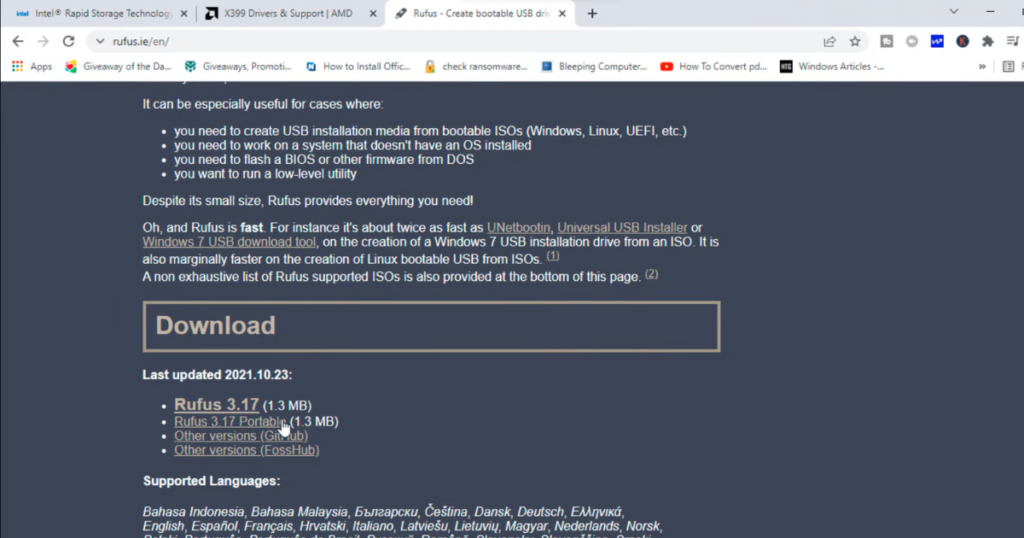
- Download “Rufus” from its official website and run the tool.
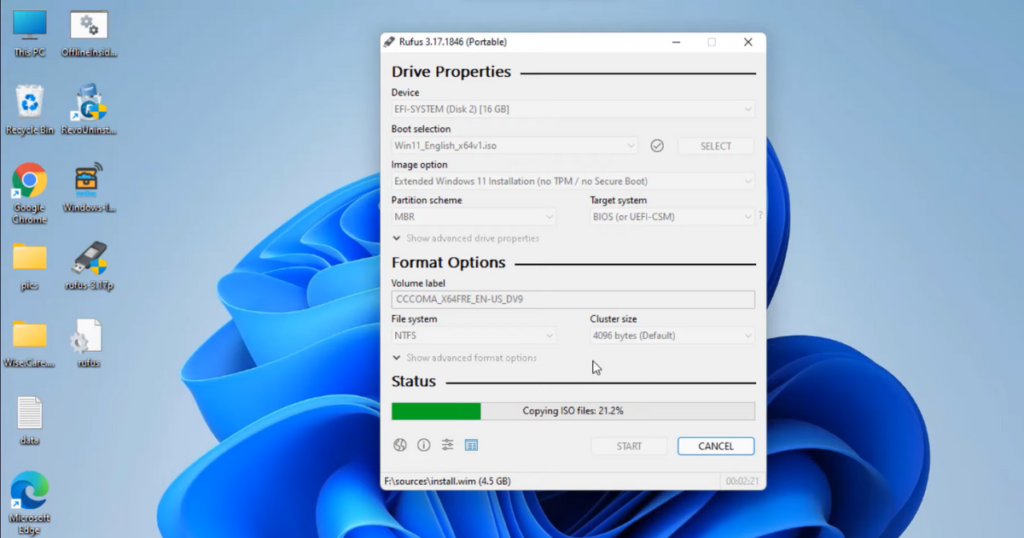
- After running attach your 16GB USB drive then you can see that under device option then click on “select” and choose the Windows ISO file.
- Choose the appropriate partition style (GPT for UEFI, MBR for BIOS).
- Optionally, select the extended Windows 11 installation option to bypass TPM and secure boot.
- Click “Start” to create the bootable USB drive.
- Boot your system using the newly created USB drive and check if the problem persists.
Method 3: Installing RAID Drivers
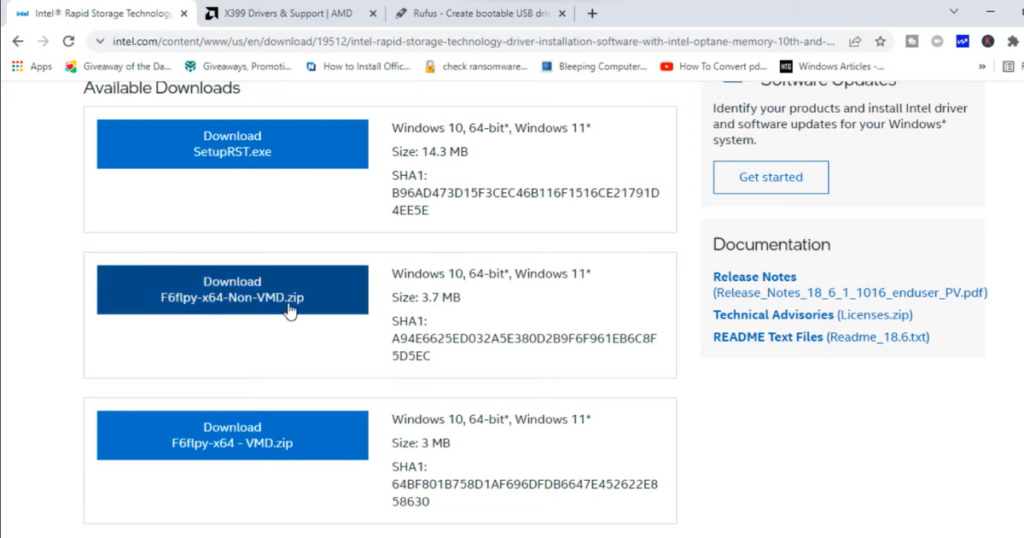
- Download “RAID drivers” from the official websites for Intel and AMD, as per your system.
- Create a “drivers” folder and extract the downloaded files into it.
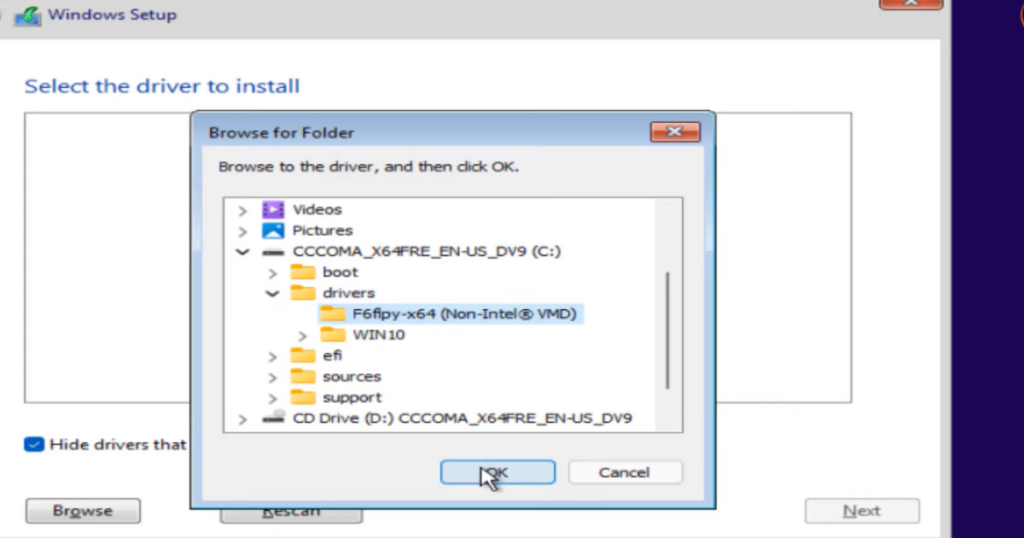
- Copy the “drivers” folder to your Windows 10 or Windows 11 USB media.
- Boot into your system using the USB media, click on “Load Driver,” browse to the USB drive, and select the driver folder.
- Uncheck the option to hide drivers that are not compatible.
- Choose the appropriate driver for your processor series (for Intel) and proceed.
- If this method fails, the final option is to format your hard disk.
Method 4: Formatting Hard Disk
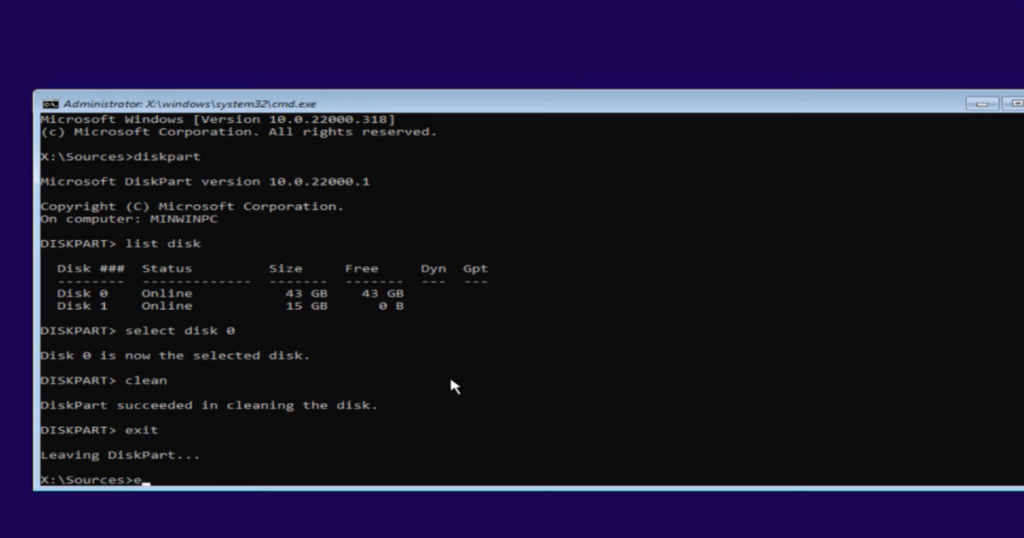
- Simultaneously press “Shift and F10” to open CMD.
- Type “diskpart,” then “list disk” to identify your hard disk.
- Select the disk using “select disk [disk number]” and type “clean” to wipe the hard disk.
- Type “exit” twice to close the command prompt.
- Install Windows using the same process after formatting.
Conclusion :
Resume Windows Installation. With the driver issue resolved, you can now proceed with confidence to complete the Windows installation process without any hindrance. Please ensure to back up your data before proceeding with any method. I hope this guide proves helpful in overcoming the ‘No Drives Found’ error during Windows installation. Happy installing!

