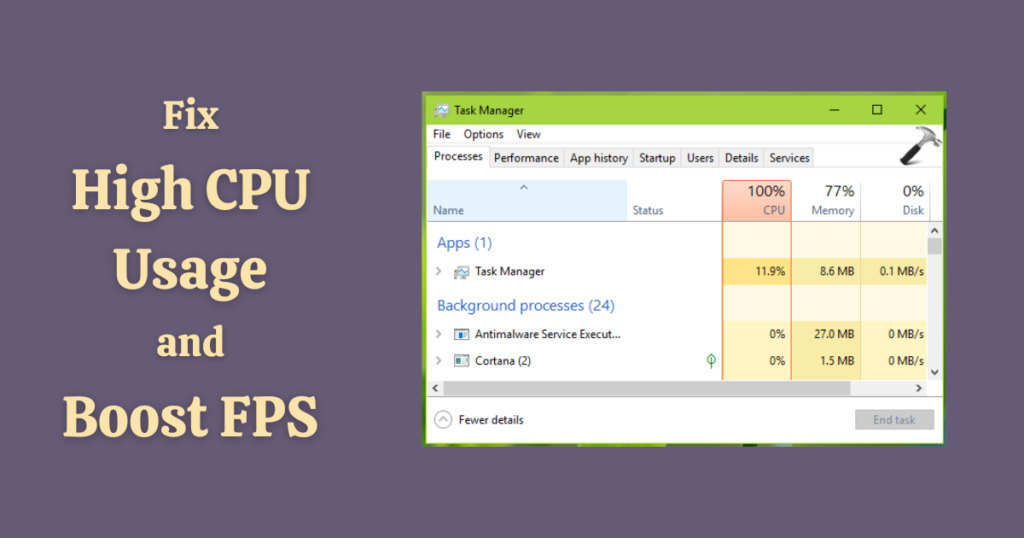
Hello everyone, Today in this blog we’ll address Ultimate Guide to Fix High CPU Usage and Boost FPS . This is the common performance issues like high CPU usage, 100% disk or CPU usage, and lagging FPS in games. In this follow-up blog, we’ll dive into more advanced steps to optimize your computer’s performance. Make sure to follow all the steps to fix your machine.
Method 1
Step 1: Device Manager
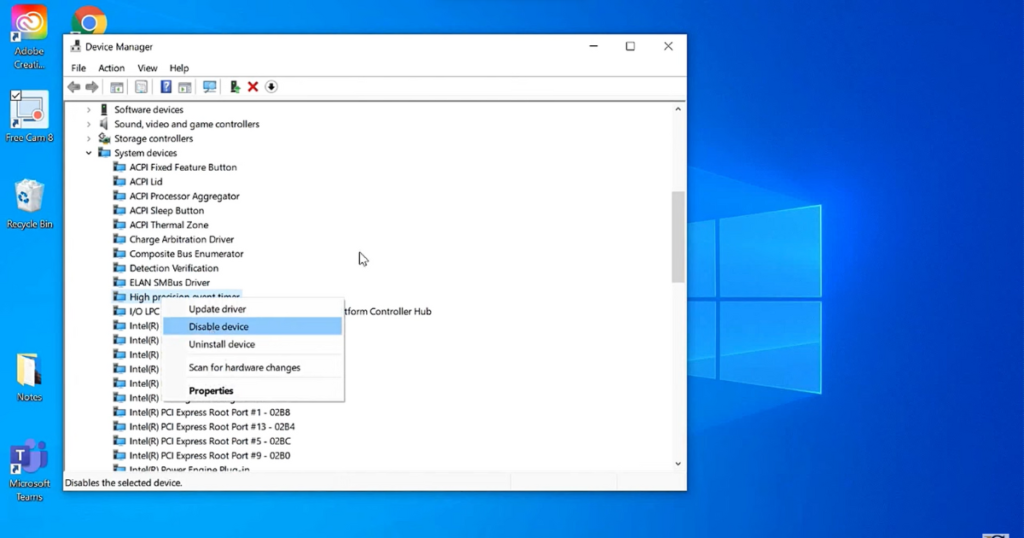
Start by navigating to the Device Manager. Right-click on the “High Precision Event Timer” under System Devices and disable it. This can significantly improve your system’s performance. Once done, close the Device Manager.
Step 2: Registry Editing
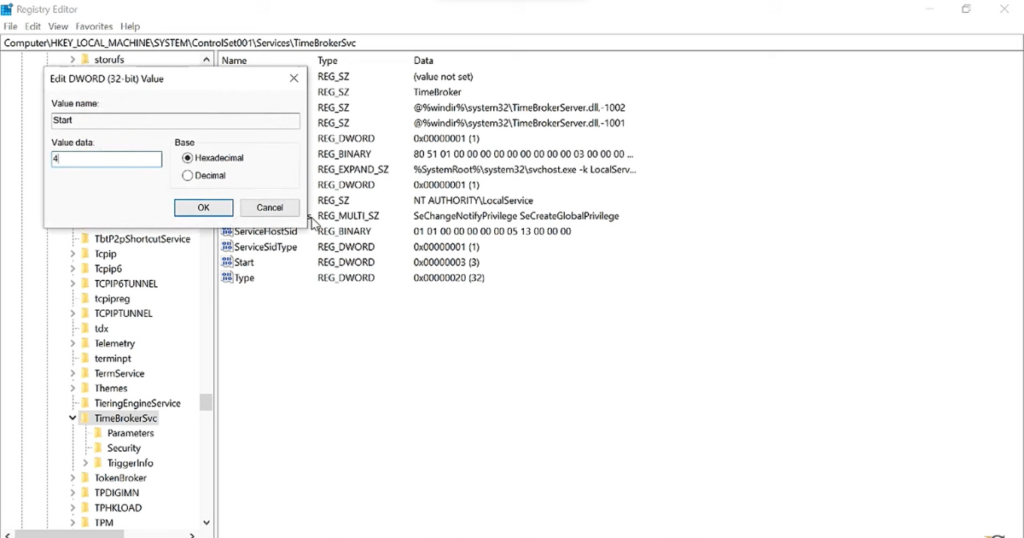
Next, we’ll perform registry editing. Press Win + R, type “regedit,” and press Enter. Follow these steps:
- Go to HKEY_LOCAL_MACHINE.
- Navigate to System > CurrentControlSet > Services.
- Select any folder, type “t,” and find “TimeBrokerSvc.”
- Right-click on Start, go to Modify, and change the value to 4.
- Click OK and close the Registry Editor.
Step 3: Refresh Windows
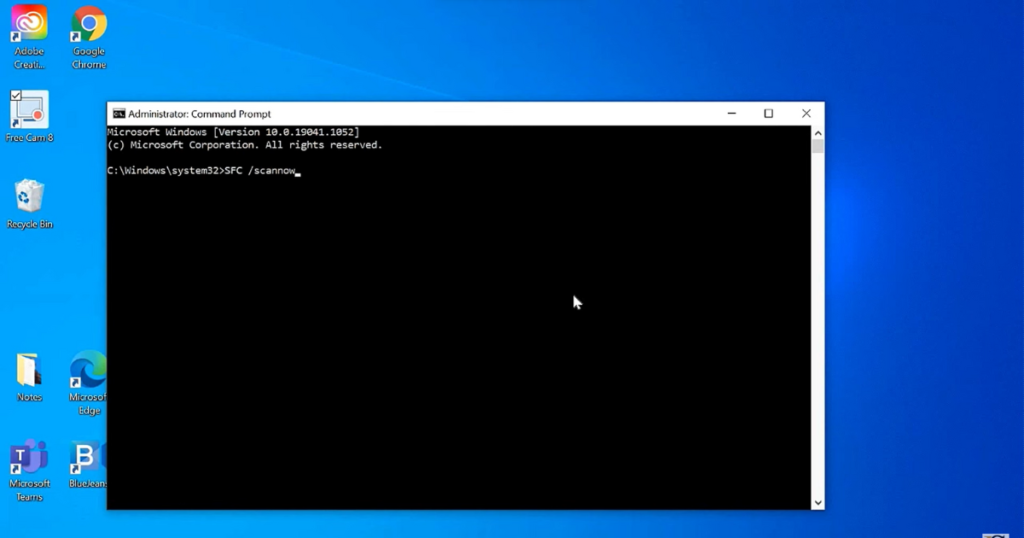
Refreshing Windows is a good practice for system repair. Open Command Prompt as an administrator and type “SFC /scannow.” Wait for it to complete (5-10 minutes), then restart your machine.
Step 4: Power Options
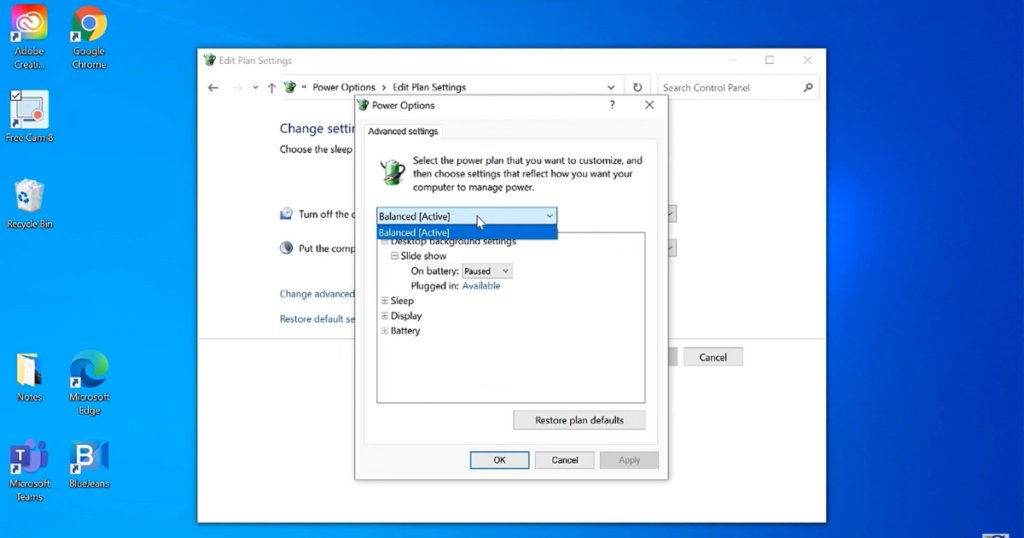
Search for “power” in Windows search bar and click on “Edit power plan” or access it through Control Panel. Follow these steps:
- Go to Power Options and Click on “Change plan settings” on right hand side panel.
- Go to “Change advanced power settings.”
- Set the power plan to “Balanced” or “High Performance” (if available).
- Click Apply and restart your computer.
Method 2
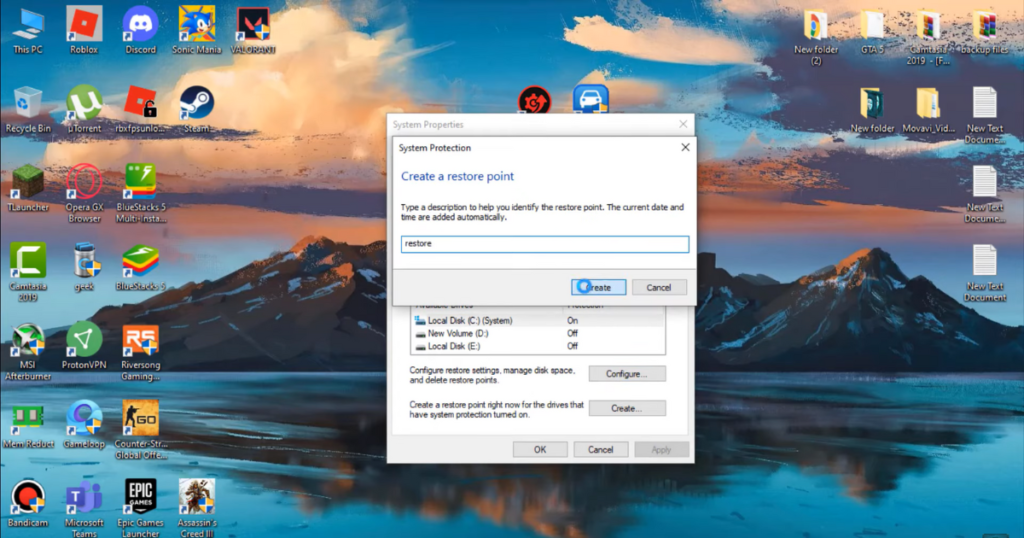
Step 1: Create a Restore Point
- Open the search bar and type “create a restore point.”
- Select the C drive, click on “Configure.”
- Ensure system protection is on, click apply, and then OK.
- Click “Create,” name the restore point, and complete the process.
Step 2: Disable Startup Programs
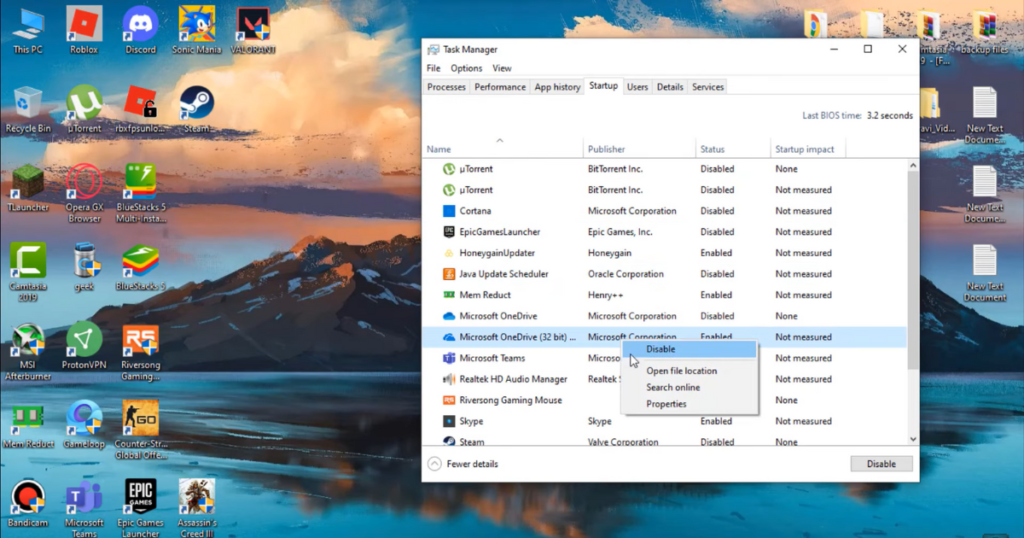
- Open Task Manager and go to the “Startup” tab.
- Disable unnecessary programs running on startup.
- Avoid disabling critical programs, like Vanguard for Valorant.
Step 3: Turn Off Background Apps and Update Windows
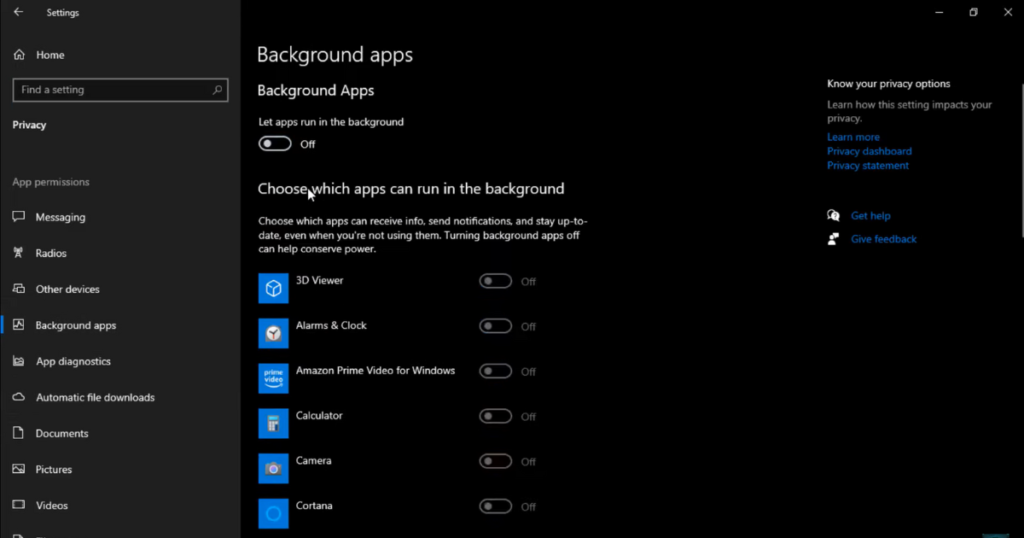
- Go to Settings, click on “Privacy“, and scroll to Background apps.
- Disable unnecessary background apps to reduce CPU usage.
- Check for updates in the Update and Security section of Windows Settings.
- Install any available updates to improve system performance.
Step 4: Disable Windows 10 Animations
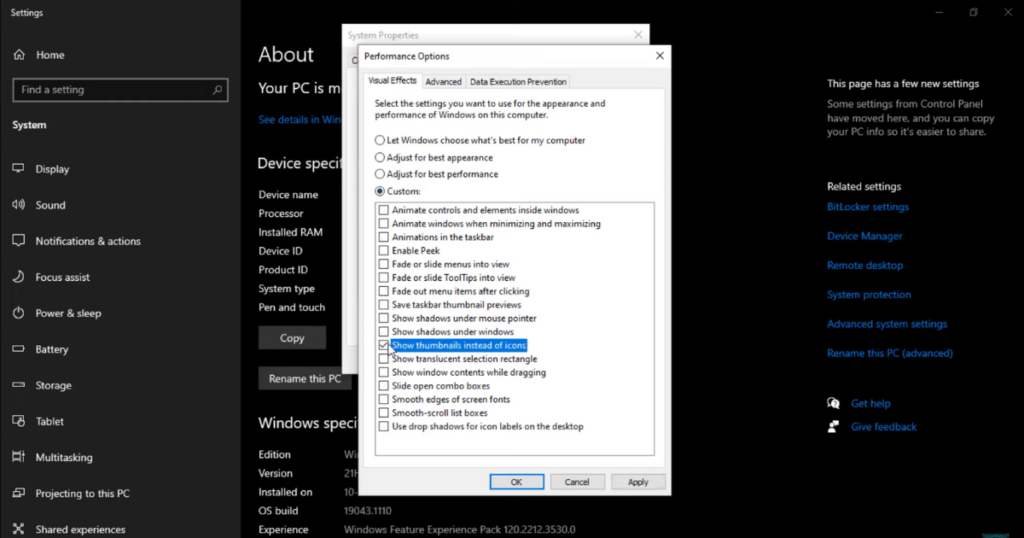
- Right-click on “This PC” and go to properties.
- Under Advanced System Settings, then under Advanced tab click on Settings.
- Change to custom settings and enable “Show thumbnails instead of icons” and “Smooth edges of screen fonts.”
Step 5: Adjust Processor Settings
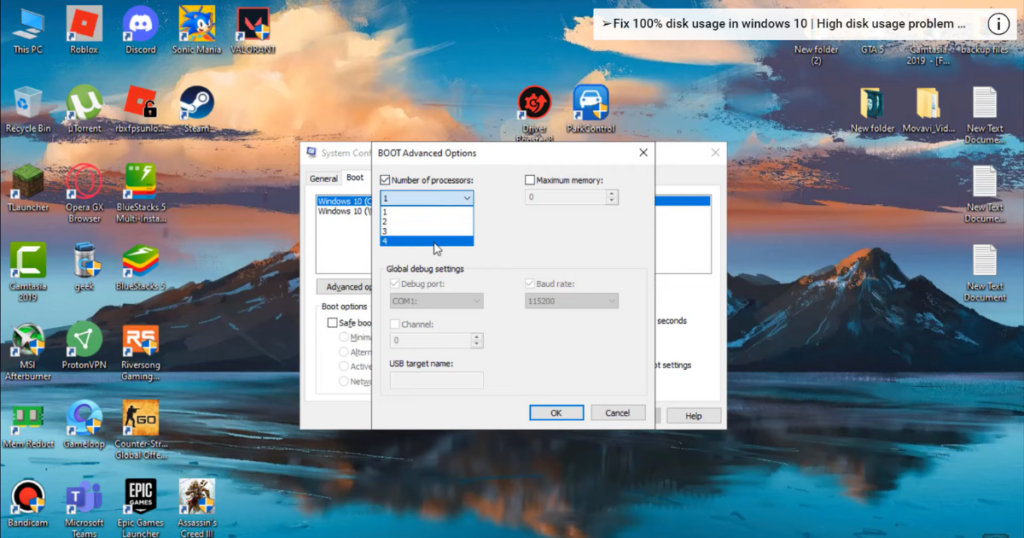
- Press Windows + R, type “msconfig,” and hit enter.
- Click on “Boot” and go to advanced options.
- Check the number of processors and set it to the maximum available.
- Apply the changes and restart later.
Step 6: Disable Services
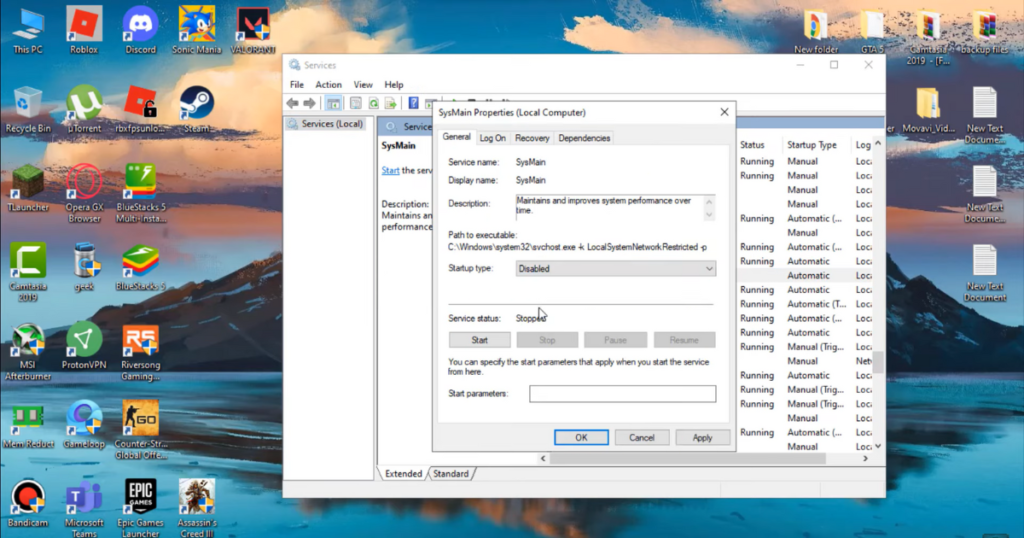
- Press Windows key + R, type “services.msc,” and hit enter.
- Disable Superfetch or Sysmain service and Windows Search service.
Step 7: End Unnecessary Background Processes
- Open Task Manager and identify unnecessary background processes.
- End task on these processes to reduce CPU usage.
Step 8: Create a New Power Plan
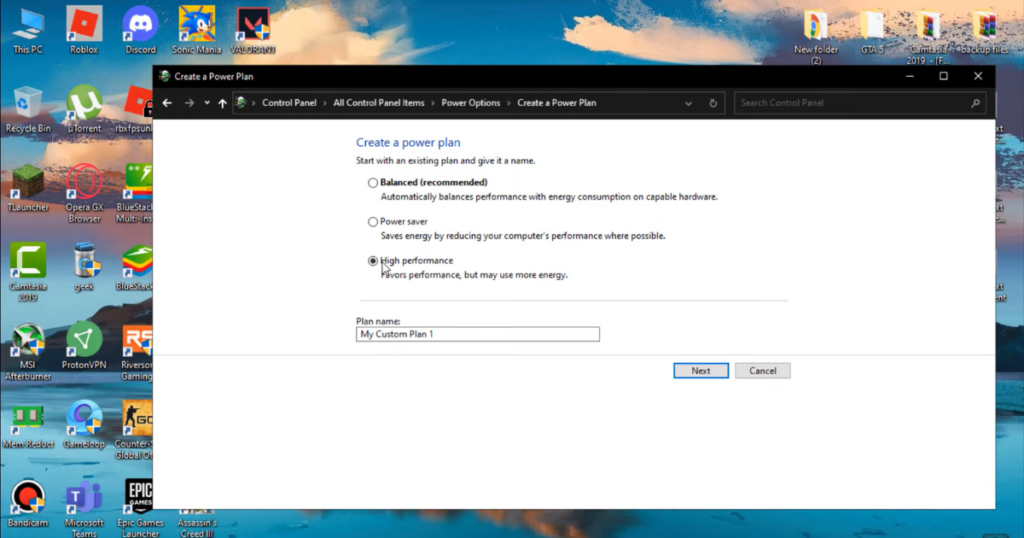
- Right-click on the battery icon, go to power options, and create a new high-performance power plan.
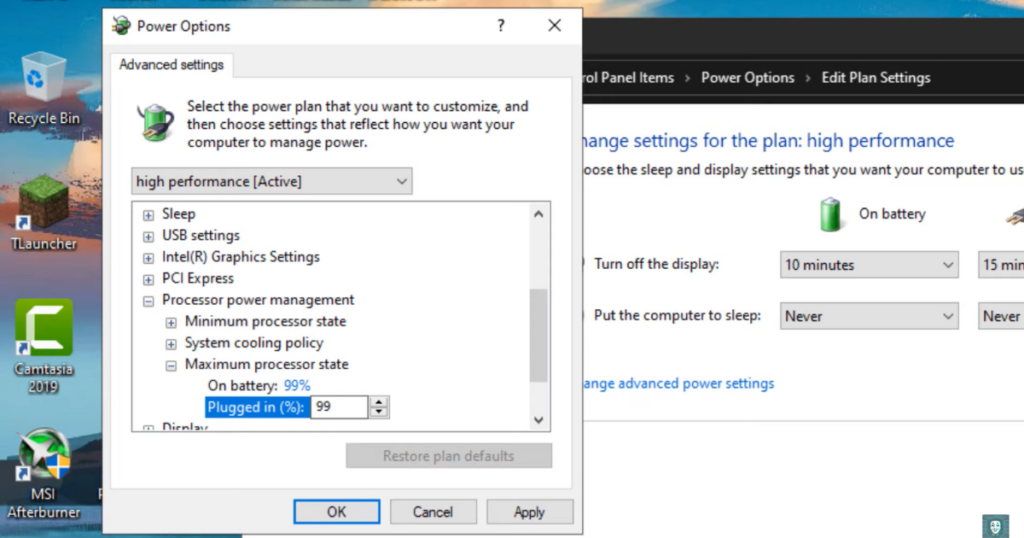
- Now click on change plan settings, then advance power settings. Now expand processor power management. Set maximum processor state on battery to 99% and in plugged in set 99% and in minimum processor state plugged into 99% and also make sure the system cooling policy are both active. Now click on apply and then ok.
Step 9: Install Park Control and Drivers
- Download Park Control and set it to high performance, enabling all options.
- Download Driver Booster and use it to automatically scan and update outdated drivers.
Step 10: Clean System Fans
- Regularly clean dust out of the fan vents to prevent overheating.
Conclusion:
Completing these steps can work wonders for your computer’s performance. Feel free to let me know in the comments if this guide helped you or if you have any questions. Thank You!

